Altula
Welcome to Altula Canada
- Contact Us
- Contact Us
- 877-908-2113 (Canada)
- +44 (0) 2036 080 627 (UK)
- Sales
- Languages
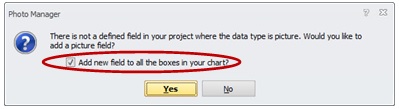
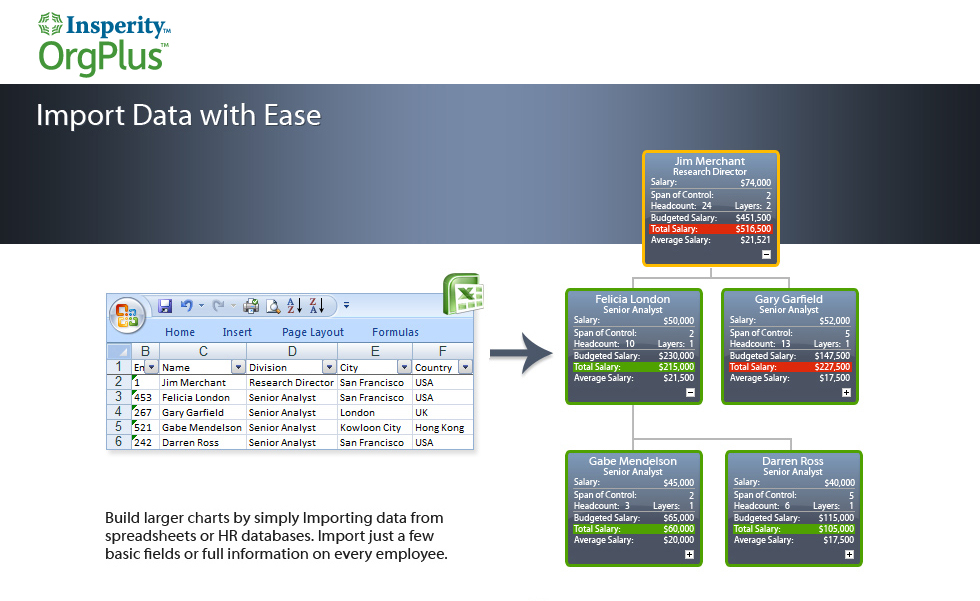
Once you have prepared your images, use the OrgPlus Photo Manager to import the photo files and associate them with your chart records. You can choose to add the photo field automatically to all chart boxes.
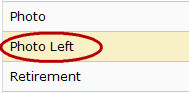
To create a polished box layout, apply the Photo Left view to your chart boxes.
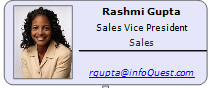
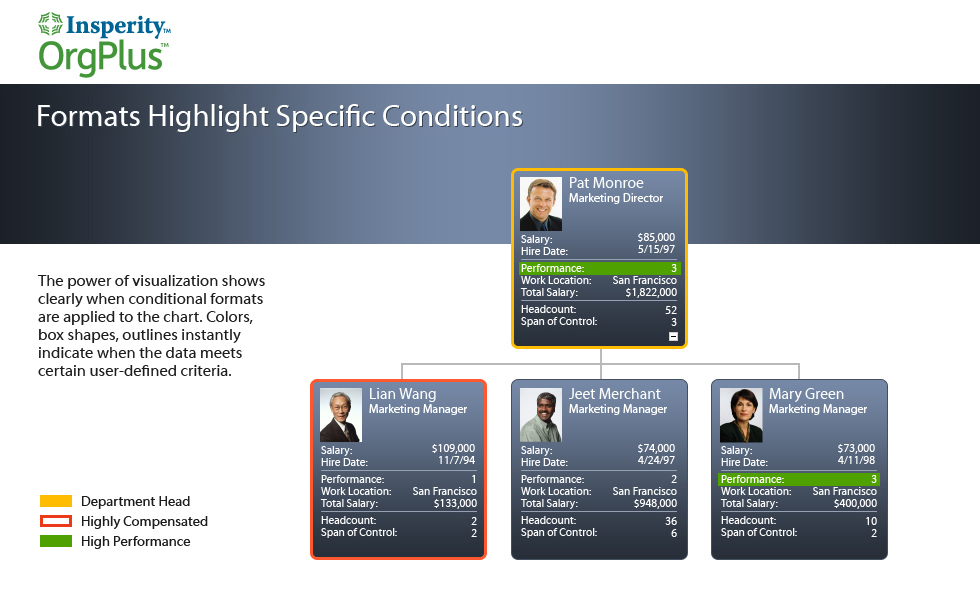
By planning ahead and preparing your employee photos before importing them into OrgPlus, you will achieve the strongest, most impactful images. Photos personalize your charts like no other data, and thoughtfully edited and formatted images will make your charts look good as well as inform your audience.